Erlang ‘One Weird Trick’ Goodiebag
I’ve asked the Erlang twittersphere what they think every Erlang developer should know about. The result is this Erlang random goodiebag. I would love to hear your ‘One weird trick’ in the comments!
Read on →
I’ve asked the Erlang twittersphere what they think every Erlang developer should know about. The result is this Erlang random goodiebag. I would love to hear your ‘One weird trick’ in the comments!
Read on →
Update April 15 – 2014: Erlang/OTP 17.0 with a working WX library is now also available through Homebrew: brew install wxmac erlang. HT @dhc_
This post is an update of HOWTO: “Erlang R17-RC2 on OSX Mavericks with WX and a working Observer”.
Today’s Erlang/OTP 17.0 release is ‘the best Erlang yet’ and contains two significant language changes: Maps and Named arguments in funs.
Erlang uses wxWidgets, a cross platform GUI library for it’s GUI tools. This build dependency was hard to get working pre-17, especially for 64-bit Erlang. However, 17.0 brings double rainbows and care bears for everyone that reads this HOWTO. So Enjoy!

As far as I know you need have Xcode install to compile Erlang from source. You can download Xcode via the Mac App Store
If you have multiple versions of Xcode installed (beta’s for example), make sure the Command Line Tools are installed and are pointing to the correct Xcode version.
Initiating an install of the Xcode Command Line Tools:
bash
$ xcode-select --install
And verify that the CL-tools point to the correct Xcode install
bash
$ xcode-select -s /Applications/Xcode.app/Contents/Developer
wxWidgets is a Cross Platform GUI library that’s used by Erlang for applications like Observer.
Execute this line and get some coffee, walk the dog, take out the trash and/or play with your kids. Compilation takes a while.
bash
$ curl -O http://optimate.dl.sourceforge.net/project/wxwindows/3.0.0/wxWidgets-3.0.0.tar.bz2
$ tar xvjf wxWidgets-3.0.0.tar.bz2
$ cd wxWidgets-3.0.0.tar.bz2
$ ./configure --with-cocoa --prefix=/usr/local
$ make && sudo make install
$ export PATH=/usr/local/bin:$PATH
Check that you got the correct wx-config
bash
$ which wx-config
Kerl is a utility that helps you build and manage multiple instances of Erlang/OTP.
bash
$ curl -O https://raw.github.com/spawngrid/kerl/master/kerl
$ chmod a+x kerl
Create ~/.kerlrc. I use $ vim ~/.kerlrc.
Add these lines:
bash
KERL_CONFIGURE_OPTIONS="--disable-debug --without-javac --enable-shared-zlib --enable-dynamic-ssl-lib --enable-hipe --enable-smp-support --enable-threads --enable-kernel-poll --with-wx"
bash
$ kerl update releases
$ kerl build 17.0 17.0
For a 32-bit Erlang prefix kerl build with CPPFLAGS:
bash
$ CPPFLAGS="-arch i386" kerl build 17.0 17.0
Install:
bash
$ kerl install 17.0 ~/erlang_17_0
Activate:
bash
$ . ~/erlang_17_0/activate
And bliss out on your new wx-enabled Erlang:
bash
$ erl -s observer start
Always wanted to learn Erlang? Let’s create your first Erlang “Hello World” program in style!
In this HOWTO I’ll show you how to setup a bleeding edge Erlang development VPS and how to run you first Erlang program.
Erlang’s main strength is it’s concurrency support. It likes cores, so for our ‘Hello World’ program we obviously need cores. Lot’s! Not 4, not 8, 20!
Create an account on Digital Ocean if you don’t have one yet (love them) and we’re going to boot up their biggest instance. It’s a steal at less than 1 dollar per hour. Just make sure you destroy it when done.
64GB and 20 cores will make our Hello World so snappy!

ssh root@your_ip_address.We’re going to compile Erlang from it’s github repository master branch, At the time of writing it’s a few commits after R17 release candidate 2 which comes with a Hipe LLVM backend, maps and named funs. If that doesn’t make any sense, no worries, just remember it’s the fastest Erlang yet. And fast is good.
Install the required Ubuntu packages:
bash
$ apt-get install tmux build-essential emacs24 git-core libncurses5-dev libssl-dev autconf htop
Fire up Tmux:
bash
$ tmux
Install Kerl, a tool which makes building and switching Erlang versions easy.
bash
$ curl -O https://raw.github.com/spawngrid/kerl/master/kerl
$ chmod a+x kerl
Let’s add some good configuration options for our Erlang installation
bash
$ emacs .kerlrc
And add
text
KERL_CONFIGURE_OPTIONS="--disable-debug --without-javac --enable-shared-zlib --enable-dynamic-ssl-lib --enable-hipe --enable-smp-support --enable-threads --enable-kernel-poll"
And because we can, we forge our Erlang installation on 20 cores. Muahahaha.
To see those cores sweat for you on compilation, create another tmux window CTRL-b c and run htop.

Besides the eye candy, compilation finishes under 5 minutes on a 20 core Digital Ocean Droplet. Whoop!
To start compilation of Erlang:
bash
$ export MAKEFLAGS=-j20 && ./kerl build git git://github.com/erlang/otp.git master erlang_llvm
After compilation we need to install the build and activate it:
bash
$ kerl install erlang_llvm erlang_llvm
$ . ~/erlang_llvm/activate
Great! We are now ready for our Pièce de résistance.
Real Erlang hacker use Emacs, so let’s setup Emacs for Erlang development.
Fetch a good base config for Emacs:
bash
$ curl -o https://gist.githubusercontent.com/wardbekker/22a1bd79eb93af85fde0/raw/41eb32cbe1bc231c21fba8ec090e537805de2c58/.emacs
Start up Emacs emacs. It will complain that it can’t find projmake-mode. Let’s fix that:
[ESC]-x package-install [Enter] projmake-mode
Exit emacs:
[CTRL]-x [CTRL]-c
Start up Emacs again emacs. Great! We can finally start writing our “Hello World” program. Oh, not, wait. First, we create a projmake file. The file is needed by Projmake-mode, a Flymake inspired mode that compiles your program on every save and shows build errors and warnings inline. Really useful!
[CRTL]-x f projmake [Enter]
Add these line and save the file
cl
(projmake
 :name  "Hello"
 :shell "erlc +native hello.erl")
Ok, now we can really start writing our “Hello World” program and put those 20 cores and 64GB RAM to good use.
[CTRL]-x f hello.erl [Enter]
And type or paste:
```erlang -module(hello). -export([just_say/0]).
just_say() –>
io_format("hello~n", []).
```
And save with [CTRL]-x [CTRL]-s.
Whoops. We made an error as projmake-mode shows:

Replace io_format with io:format and save again. That fixes our error!.
Let’s run our program. Fire up the Erlang shell with:
[ESC]-x erlang-shell
Load the hello module with:
1> m(hello). [Enter]
And run you first Erlang function….
2> hello:just_say(). [Enter]
Bliss!

Congratulations. You now have a powerful Erlang development environment in your hands.
Check out A beginners guide to Erlang to continue your Erlang binge.
Selenium is the industry standard for automated testing of web applications. Together with Webdriver, a ‘remote control’ API for all major browsers, it enables you to create robust integration test for the browser.
The great people of QuviQ, creators of the unique Quickcheck test framework, created an Erlang Webdriver client implementation (Github repository).
It’s trivial to get started with the following steps:
Open rebar.config in your favorite editor, and make sure webdrv is listed as dependency. I use a fork of the original repository that support rebar:
```erlang {deps, [
{webdrv, "", {git, "https://github.com/ehedenst/webdrv.git", {branch, "master"}}},
   ]}.
```
Go to the root of your Erlang project and execute:
bash
$ rebar get-deps compile
For this quick start we will be using the Google Chromedriver. Get the right package for your environment here. I’m now on a Mac, so:
bash
$ curl -O http://chromedriver.storage.googleapis.com/2.9/chromedriver_mac32.zip
$ unzip chromedriver_mac32.zip
$ ./chromedriver
The last line starts up the Chromedriver server and if all went well, you should get the following output:
bash
Starting ChromeDriver (v2.9.248307) on port 9515
Important! This server needs to be running during test execution.
Save the following module in src/random_org_test.erl. In this test we open a page, fill in a form, submit the form, and check if an expected piece of text is indeed present in the response:
```erlang -module(random_org_test).
-compile(export_all).
-include_lib(“webdrv/include/webdrv.hrl”).
-define(CHROMEDRIVER, “http://localhost:9515/”).
test() –>
{ok, _Pid} = webdrv_session:start_session(test, ?CHROMEDRIVER,  webdrv_cap:default_chrome(), 10000),
webdrv_session:set_url(test, "http://www.random.org/integers/"),
{ok, Emin} = webdrv_session:find_element(test, "name", "min"),
webdrv_session:clear_element(test, Emin),
webdrv_session:send_value(test, Emin, "5"),
{ok, Emax} = webdrv_session:find_element(test, "name", "max"),
webdrv_session:clear_element(test, Emax),
webdrv_session:send_value(test, Emax, "15"),
webdrv_session:submit(test, Emax),
{ok, PageSource} = webdrv_session:get_page_source(test),
string:str(PageSource, "Here are your random numbers") > 0,
webdrv_session:stop_session(test).
```
Run your test by opening up the Erlang shell..
bash
$ erl -pa ebin deps/*/ebin
..and execute the test function
bash
1> random_org_test:test().
You should see the Chrome browser opening in the background, quickly flashing some pages, closing, and on the Erlang shell the anticlamatic output ok.
Update 15 April 2014 Erlang/OTP 17.0 is released. Read the updated HOWTO here.
Update 11 Feb 2014 Dan GudMundsson pointed out that starting with R17 both 32 and 64 bit Erlang will work with wxWidgets. I’ve updated part of this blog post with the instructions found in the official Erlang/OTP installation HOWTO.
This post is based on HOWTO: Getting wx to work with Erlang r16b02 on OS X by Martin Schuerrer
Erlang R17-rc1 is ‘the best Erlang yet’ and contains two significant language changes: Maps and named arguments in funs.
Erlang uses wxWidgets, a cross platform GUI library for it’s GUI tools. This build dependency was hard to get working pre-R17, especially for 64-bit Erlang. However, R17 brings double rainbows and care bears for everyone that reads this HOWTO. So Enjoy!
bash
$ xcode-select -s /Applications/Xcode.app/Contents/Developer
or if you installed a beta version (in my case 51-Beta5):
bash
$ xcode-select -s /Applications/Xcode51-Beta5.app/Contents/Developer
wxWidgets is a Cross Platform GUI library that’s used by Erlang for applications like Observer.
Execute this line and get some coffee, walk the dog, take out the trash and/or play with your kids. Compilation takes a while.
bash
$ curl -O http://optimate.dl.sourceforge.net/project/wxwindows/3.0.0/wxWidgets-3.0.0.tar.bz2
$ tar xvjf wxWidgets-3.0.0.tar.bz2
$ cd wxWidgets-3.0.0.tar.bz2
$ ./configure --with-cocoa --prefix=/usr/local
$ make && sudo make install
$ export PATH=/usr/local/bin:$PATH
Check that you got the correct wx-config
bash
$ which wx-config
Kerl is a utility that helps you build and manage multiple instances of Erlang/OTP.
bash
$ curl -O https://raw.github.com/spawngrid/kerl/master/kerl
$ chmod a+x kerl
Create ~/.kerlrc. I use $ vim ~/.kerlrc.
Add these lines:
bash
KERL_CONFIGURE_OPTIONS="--disable-debug --without-javac --enable-shared-zlib --enable-dynamic-ssl-lib --enable-hipe --enable-smp-support --enable-threads --enable-kernel-poll --with-wx"
bash
$ kerl update releases
$ kerl build 17.0-rc1 17rc1
For a 32-bit Erlang prefix kerl build with CPPFLAGS:
bash
$ CPPFLAGS="-arch i386" kerl build 17.0-rc1 17rc1
Install:
bash
$ kerl install 17rc1 ~/17rc1
Activate:
bash
$ . ~/17rc1/activate
And bliss out on your new wx-enabled Erlang:
bash
$ erl -s observer start
Erlang/OTP is designed for building large, scalable, soft-realtime systems with high availability. Testing such systems is non-trivial, useful automated testing even more so. That’s why Erlang comes with some advanced testing libraries.
The three most important methods are explained here by a few simple examples:
First clone the project from Github using the command:
sh
$ git clone git@github.com:wardbekker/ci_quickstart.git
For compiling and executing the project we use Rebar, a sophisticated build-tool for Erlang projects that follows OTP principles. Steps to build rebar:
sh
$ git clone git://github.com/basho/rebar.git
$ cd rebar
$ ./bootstrap
Recompile: src/getopt
...
Recompile: src/rebar_utils
==> rebar (compile)
Congratulations! You now have a self-contained script called "rebar" in
your current working directory. Place this script anywhere in your path
and you can use rebar to build OTP-compliant apps.
Let’s start with the most simple test method; EUnit. It’s Erlang unit testing library. A unit test check if a function returns the expected result for a given input. In the example below the function addition is defined in the module ci_quickstart_math and two assertions are used:
?assertEqual(expected, actual)?assertNotEqual(expected, actual).Try it our yourself with executing EUnit from the command line: rebar get-deps compile eunit:
```erlang -module(ci_quickstart_math). -export([addition/2]).
-ifdef(TEST). -include_lib(“eunit/include/eunit.hrl”). -endif.
addition(X, Y) –>
X + Y.
-ifdef(TEST).
simple_test() –>
?assertEqual(4, addition(2,2)),
?assertNotEqual(3, addition(1,1)).
-endif. ```
Did all test pass? Excellent! Now the bad news. The actual value of this type of test if quite low. Are we sure the addition function works correct for all possible input? We are now only certain of these cases:
addition(2,2) == 4addition(1,1) /= 3And even then, when I change the body of the addition function in obviously something totally wrong:
```erlang addition(X, Y) –>
4.
```
The tests will still pass!
So, with unit tests our assertions may be correct, but the function body of addition can be a steaming pile of canis faeces.
It’s even worse; As in this case, the arguments of addition are 64-bit small integers, which have a range of -576460752303423489 – 576460752303423488. With two arguments, that is a humongous amount of inputs we should test to be really sure our function works correctly. In the example unit test we only check two? Even adding twenty more cases, the hard worker that you are, effectively have very little value.
Depressed already? On to the good stuff.
Continuing with the addition example; what we actually want is a test method that generated all possible inputs, and checks the result. Erlang has this, and the method is called QuickCheck. Erlang even has multiple QuickCheck-style libraries available:
A QuickCheck test, also called a property for addition function looks like this:
```erlang prop_sum() –>
?FORALL(
    {X, Y},
    {int(), int()},
    addition(X,Y) - Y == X
).
```
Test this example from the command line by executing ./shell.sh. You will enter the Erlang shell. Then execute proper:quickcheck(ci_quickstart_math:prop_sum())..
If we look at the implementation of the QuickCheck test, notice that we are not testing specific numbers. We are testing a property of the addition function, namely when we add int X and Y, and subtract Y from the result of the addition, we should be left with X again.
The code {int(), int()} specifies that the QuickCheck should generate tuples with two random integers. Each generated tuple is bound to the pattern {X, Y} by Erlang pattern matching. Quickcheck will generate 100 combinations by default. With the numtests option we can increase this considerably: proper:quickcheck(ci_quickstart_math:prop_sum(),[{numtests,10000}])..
The challenge when using Quickcheck style testing, is to come up with good function properties. This is much harder than writing unit tests. It’s even more difficult to reason about function properties than actually writing the actual function. So why bother?
Reasons to use QuickCheck:
As you might know, Erlang is a very good fit for building concurrent, distributed and fault tolerant systems. Testing if what you build is actually has those properties, is quite complex.
For that, Erlang offers Common Test. This test frameworks can do the heavy lifting required for meaningful system tests. The inherent complexity of concurrent, distributed en fault tolerant systems is reflected in Common Test. So, in this introduction we only take a very quick glance. In this example we mimic the initial unit test using pattern matching for assertions.
```erlang -module(basic_SUITE). -include_lib(“common_test/include/ct.hrl”).
-export([all/0]). -export([test1/1, test2/1]).
all() –> [test1,test2].
test1(_Config) –>
3 = ci_quickstart_math:addition(1,2). %% validated using pattern matching
test2(_Config) –>
2 = ci_quickstart_math:addition(1,1). %% validated using pattern matching
```
During development, you run your Erlang automated tests on your own workstation. But there comes a point where that’s no longer feasible because of the long duration or high load. Or you work in a team setting where it’s important that only working code is integrated. In those cases and for several other good reasons, you need to use a Continuous integration system.
There are several continuous integration systems that allow you to run automated tests for Erlang. In this example we use Travis-CI. It’s a free hosted continuous integration service for the open source community. Travis-CI integrates with the popular Github.
Let’s add our example project to Travis-CI.
The build process of Travis-CI is configured with a .travis.yml file in the root of our repository:
yaml
language: erlang // This project is an Erlang project
notifications:
  email: you@example.org // Notify this e-mail address on build failures
otp_release: // The Erlang/OTP versions to run your test against.
  - R15B01
  - R15B
  - R14B04
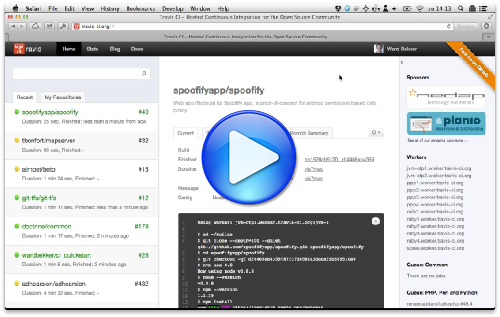
This video shows how to register with Travis-CI:
That’s it!
This video shows how Travis-CI will report an successful integration build
This video shows how Travis-CI will report an failed integration build
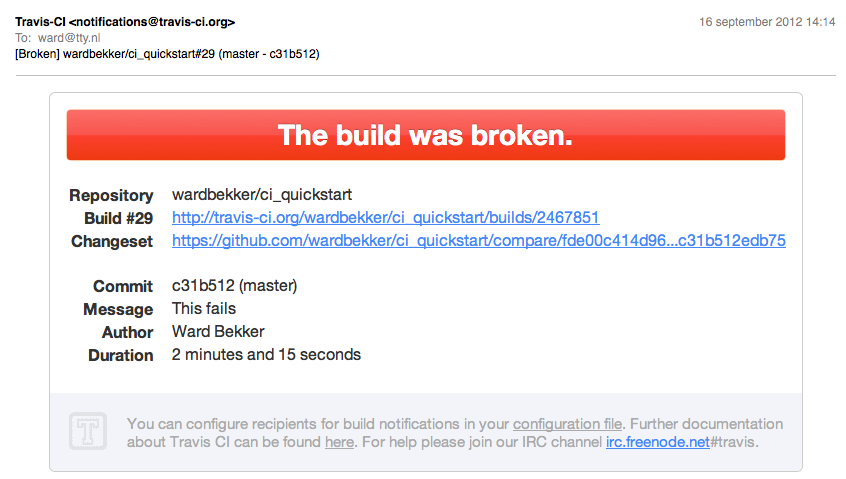
If you entered your e-mail address in .travis.yml, you will receive a mail about which commit broke the build:
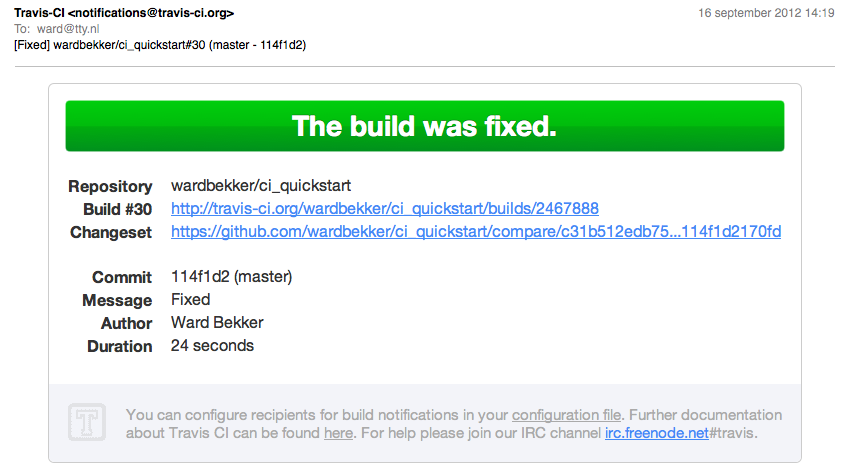
When your colleague fixed the build (you would never commit broken code, right?), you will receive a mail that the build is fixed by a new commit.
In the beginner’s mind there are many possibilities, but in the expert’s there are few
These starting points helped me getting up to speed with Erlang. I hope this information helps you too.
You can install Erlang/OTP from source, but I like the ready-to-go packages provided by Erlang Solutions.
I use Aquamacs, An Emacs for mac users, with the Erlang mode provided by Erlang/OTP. Combined with Eric B Merritt’s projmake-mode and Mochiweb reloader this makes for a productive development environment.
The Erlang Questions Mailinglist is the best place to ask your Erlang questions. Don’t be surprised if you question is answered by Erlang inventors themselves!
As with other programming languages Stack overflow is also a great place to get answers to your pressing Erlang questions.
Compared to Java, the quantity of Erlang books is low. But the quality is pretty good! And a little birdy told me that some great new books will be published in the near future. Warning: affiliate links to Amazon ahead. You will be sponsoring my caffeine intake. Thank you.
I recently gave a talk introducing the great automated testing facilities of Erlang. Check out the video and slides
With help from former collegue & friend Josh Kalderimis I’ve added the first iteration of Erlang support to Travis-CI. It’s a free continuous integration service for open source projects. It’s used by well known Erlang projects like Basho Riak, Elixir and Mochiweb. See the documentation how to add your project.
If you can read Dutch, you can also read my blog post about Geautomatiseerd testen met Erlang/OTP en Travis-CI which covers the same ground.
Two of the three Erlang inventors are active tweeps:
Want more? Bryan Hunter maintains a list of Erlang folks on twitter .
Want to learn Erlang from the absolute best? Most popular Erlang projects are open source. Make some coffee, clone the repositories and learn from the code of the Erlang gods. Below a selection:
Explore more popular Erlang projects on Github’s Erlang page
The Erlang Factory conferences are the best places to meet professional Erlang developers. I’ve attended a few of them, and I am always amazed by the quality of the speakers and the hallway discussions. Pro tip: make sure you have a substantial lunch and then stay for the drinks.
A few local active user groups that I’m aware of:
Explore more Erlang user groups on Meetup
I attended the three day Erlang/OTP express course from Erlang Solutions and got a much better understanding of OTP. Erlang Solutions also provide E-learning training.
I also heard some good things from the Erlang Camp by Erlware. This is a intensive two day trainings for beginners and intermediate Erlang programmers.
Erlang/OTP is ontworpen voor het bouwen van grote, schaalbare, soft-realtime systemen met een hoge beschikbaarheid. Het testen van dergelijke systemen is niet eenvoudig, laat staan geautomatiseerd testen. Voor Erlang zijn er dan ook geavanceerde automatische test methoden beschikbaar.
De drie belangrijkste methoden worden hier kort besproken aan de hand van een test project. De methoden zijn:
Je cloned het project van Github met het volgende commando:
sh
$ git clone git@github.com:wardbekker/ci_quickstart.git
Voor het compileren van het project en uitvoeren van de testen gebruik je Rebar, een sophisticated build-tool for Erlang projects that follows OTP principles. Je bouwt Rebar als volgt:
sh
$ git clone git://github.com/basho/rebar.git
$ cd rebar
$ ./bootstrap
Recompile: src/getopt
...
Recompile: src/rebar_utils
==> rebar (compile)
Congratulations! You now have a self-contained script called "rebar" in
your current working directory. Place this script anywhere in your path
and you can use rebar to build OTP-compliant apps.
Je begint met de eenvoudigste test methode; EUnit. Dit is een unit testing bibliotheek voor Erlang. In een unit test controleer je of de functie goed werkt bij bekende input en resultaat. In dit voorbeeld heb je de functie addition geimplementeerd in de module ci_quickstart_math en twee assertions. (Je voert deze test uit op de commandline met: rebar get-deps compile eunit):
```erlang -module(ci_quickstart_math). -export([addition/2]).
-ifdef(TEST). -include_lib(“eunit/include/eunit.hrl”). -endif.
addition(X, Y) –>
X + Y.
-ifdef(TEST).
simple_test() –>
?assertEqual(4, addition(2,2)),
?assertNotEqual(3, addition(1,1)).
-endif. ```
Het slechte nieuws is dat de waarde van deze test zeer laag is. Weet je nu zeker dat optelling goed gaat in alle gevallen? Het enige wat de test nu aantoont is dat:
addition(2,2) == 4addition(1,1) /= 3Stel, je verandert de implementatie van de function addition in:
```erlang addition(X, Y) –>
4.
```
De testen slagen in dit geval, maar dit betekend niet dat de implementatie van addition correct is.
Sterker nog; De argumenten zijn in dit geval 64-bit small integers, en die hebben een bereik van -576460752303423489 t/m 576460752303423488. Met twee argumenten, betekend dit dat er enorm veel verschillende input mogelijk is. En in de unit test controleer je er maar 3!?!? Ook al ben je een harde werker en test je wel 10! addities, in feite is de waarde van de unit test niet verbeterd en nog steeds erg laag.
Wat nu?
Wat je eigenlijk wil is een test methode dat alle mogelijke input variaties genereerd en de bijbehorende output controleert. Deze methode heet QuickCheck. Voor Erlang zijn er een aantal QuickCheck frameworks beschikbaar:
Een Quickcheck test voor de addition functie:
```erlang prop_sum() –>
?FORALL(
    {X, Y},
    {int(), int()},
    addition(X,Y) - Y == X
).
```
Voer de test uit door de Erlang Shell op te starten met ./shell.sh en de volgende functie aanroep proper:quickcheck(ci_quickstart_math:prop_sum()).
Specifieke nummers worden niet getest. Je gaat nu controleren of de functie voldoet aan de eigenschap dat als je Y weer er afhaalt, je X overhoud.
{int(), int()} genereerd tuples met twee random integers. De tuple wordt gebonden aan {X, Y} door pattern matching. Standaard worden er 100 combinaties getest, en dit aantal voer je op met de numtests optie: proper:quickcheck(ci_quickstart_math:prop_sum(),[{numtests,10000}])..
De uitdaging bij het werken met QuickCheck is het bedenken van de eigenschappen van de functie. Dit is lastiger dan het maken van een unit test. Sterker nog, het schrijven van de functie is vaak nog eenvoudiger dan het redeneren over de eigenschappen. Het positieve effect van QuickCheck op de kwaliteit van je code, en de manier waarop je als developer over je code nadenkt maakt deze tool een zeer waardevol onderdeel van je test gereedschapskist.
Zoals bekend is Erlang uitermate geschikt voor het bouwen van concurrent, distributed en fault tolerant systemen. Om te controleren of je systeem werkt zoals verwacht, is complex.
Hiervoor is Common Test in het leven geroepen. Dit krachtige test framework is uitermate geschikt voor de ontwikkeling van pittige systeem tests. De inherente complexiteit van concurrent, distributed en fault tolerant systemen maakt Common Test complex. Hoe je een serieuze OTP applicatie op de pijnbank legt met CT valt derhalve buiten de scope van deze blogpost. Hier onder wel een minimaal Comment Test waarin de EUnit testen worden nagebootst door gebruik van pattern matching.
```erlang -module(basic_SUITE). -include_lib(“common_test/include/ct.hrl”).
-export([all/0]). -export([test1/1, test2/1]).
all() –> [test1,test2].
test1(_Config) –>
3 = ci_quickstart_math:addition(1,2). %% validated using pattern matching
test2(_Config) –>
2 = ci_quickstart_math:addition(1,1). %% validated using pattern matching
```
Stel, je hebt een flinke hoeveelheid Eunit, Common Test en Quickcheck testen geïmplementeerd. Het uitvoeren van alle geavanceerde testen duurt lang en belast je systeem fors. Om deze, en nog meer goede redenen, is Continuous integration aan te raden.
Er zijn legio systemen waarmee het mogelijk is om continuous integration voor Erlang op te zetten. In dit voorbeeld gebruik je het hosted systeem Travis-CI. Deze dienst ondersteunt Erlang, integreert met het populaire Github en zorgt voor een vliegende start. En het is gratis voor open source projecten.
Het build proces van Travis-CI configureer je via het .travis.yml-bestand in de root van je repository. Een voorbeeld:
yaml
language: erlang // De repository bevat een Erlang project
notifications:
  email: you@example.org // Build success en failures stuurt Travis-CI naar dit adres.
otp_release: // Travis-CI test/bouwt je project voor meerdere Erlang/OTP versies.
  - R15B01
  - R15B
  - R14B04
Deze video toont hoe je start met Travis-CI:
That’s it!
Deze video toont hoe Travis-CI een geslaagde integration build rapporteerd:
Deze video toont hoe Travis-CI een mislukte integration build rapporteerd:
Als je e-mail adres in .travis.yml staat, krijg je ook een e-mail notificatie dat de laatste commit de build gebroken heeft:
Als de fout verholpen is, krijg je de volgende e-mail als de build weer slaagt:
In 2012 I presented Automated testing with Erlang at the Erlang Factory event on the London Google Campus. Slides here, watch the video below. Enjoy!
Your Erlang code is perfect, but to find out why other peoples code runs dog slow you probably profile the code with fprof like this:
1 2 3 | |
The printout of fprof analyse is a text dump of the result, which can grow over 1000 lines and contains a lot of noise which makes it hard to locate the bottlenecks. Below a truncated sample of an actual fprof trace.
KCachegrind to the rescue! With this tool you can visually inspect the fprof analyse result with sorting, a fancy call graph view, callee map and more.

As KCachegrind can’t read fprof analysis output directly, you need to convert it first to the callgrind format with the Erlgrind script by Isac Sacchi e Souza.
1
| |
For installation of KCachegrind on my Mac I use Homebrew, a package manager for OSX. Notice that you install qcachegrind, the QT version of KCachegrind.
1 2 3 | |
Installing the Erlgrind (Github) script:
1 2 3 | |
And open qcachegrind:
1
| |
Enjoy!
In the beginner’s mind there are many possibilities, but in the expert’s there are few
This post explains how to build a basic full text search server in Erlang. The server has the following features:
Familiarity with the OTP design principles is recommended.
The sample application (build with help from my colleague Michel Rijnders mies@tty.nl) uses the Creative Commons Data Dump from StackExchange as demo data.
We cover the following subjects:
Clone the source from GitHub:
git clone git://github.com/tty/async_search.git
And start the application:
$ rebar get-deps compile && erl -pa `pwd`/ebin `pwd`/deps/*/ebin +P 134217727
Eshell> application:start(async).
Eshell> stackoverflow_importer_ser:import().
Visit http://localhost:3000, you should see the following page:

Sample ranked search output for the query erlang armstrong:

Sample tags facets output for the query java:


Looking at the OTP application supervision tree is a good way to understand the architecture of an OTP application.
The application supervisor async_sup starts up the following supervisors:
keyword_sup. A keyword_ser process is created for every unique word in the StackExchange posts. This keyword_ser is linked to the keyword_sup supervisor (a simple_one_for_one supervisor). The keyword_ser child process maintains a list of document positions of a keyword (an inverted index).facet_sup. A keyword_ser process is also created for every unique facet category in the StackExchange posts. This keyword_ser process is linked to the facet_sup supervisor (a simple_one_for_one supervisor as well). The keyword_ser child process maintains a list of facet values with the IDs of the documents the facets appear in.The application supervisor also start the following gen_server singleton processes:
stackoverflow_importer_ser. This server imports the demo Stack Overflow data.document_ser. This server holds a copy of all documents, so it can return the original title and body of matching Stack Overflow posts in the results.query_ser. This server's task is to run the actual query and return results.websocket_ser. This server provides a HTTP frontend for the search engine.No attention is given to fault tolerance (apart from the basic restart strategies), thus parts of the search index are lost if a keyword_ser process terminates.
The StackExchange data is provided as XML. Since some of the documents are quite large, it's not recommended to load the full XML documents in memory. The solution is to use a SAX parser which treats a XML file as a stream, and triggers events when new elements are discovered. The search server uses the excellent SAX parser from the Erlsom library by Willem de Jong.
In the example below erlsom:parse_sax reads the XML file from FilePath and calls the function sax_event if an XML element is found.
When the element is a row element (i.e. a post element), attributes like Id, Title and Body are stored in a dictionary. For every post a copy of all the attributes in document_ser is saved. This is used for returning the actual posts for a query match. After that the add_attribute_tokens function is called:
The add_attribute_tokens function does two things. It calls add_facet (discussed later) and it creates a list of tuples with all the words and their position in the document. This process is called tokenization. Each token/position tuple is then submitted to the add_keyword_position function of the keyword_ser for indexing.
Indexing of the tuples, or keywords, is handled by the keyword_ser. For every unique word a keyword_ser process is started if not already present. The state of a keyword_ser process is a dictionary with the document ID as key and a list of positions as value. The document ID corresponds to the ID of the Stack Overflow post.
The keyword_server_name function generates a unique name under which the keyword_ser process is registered, so the module can check if a keyword already has a process or a new process needs to be created.
Stemming is the process for reducing inflected words to their base form. Computing and computer both are stemmed to comput. So when a user searches on computing, it also matches text that contains computer. This makes it possible to return results that are relevant, but do not exactly match the query.
In our sample application all keywords are stemmed using the popular Porter Algorithm. The Erlang implementation by Alden Dima is used in the application.
erlang:phash2 is used to transform the stemmed name to a hash, to make sure the registered process name is valid.
Faceted search is an important navigation feature for search engines. A user can drill down the search results by filtering on pre-defined attributes, like in this example of a digital camera search on CNET:

As mentioned above, the data import the function add_attribute_tokens also calls the add_facet function. Using pattern matching the Tags and the Creationdate attributes are selected for faceting. Tags is a so called multivalue facet, as a Stack Overflow post can have one or more tags assigned. For every tag and creation date the facet_ser:add_facet_value function is called.
facet_ser works very similar to keyword_ser. For every facet category, Tag or Creationdate in our case, a facet_ser processes is started. The state of a facet_ser is a dictionary with the Tag or Creationdate values as key and their document IDs as dictionary values.
In previous sections is shown:
keyword_ser process for every unique keyword.facet_ser process for every facet category.With the function stackoverflow_importer_ser:import() these steps are executed, and your Erlang node is now ready for querying. So how does that work?
Querying is handled by passing the user's query terms to the function do_async_query of the singleton query_ser server. When calling this function you need to specify the module, function and optional reference attribute which will be called when query results are available.
In the handle_cast the following steps are executed:
keyword_ser:do_query return all document ids that contain one or more of the user's query terms, including the relevance ranking score, which will be discussed below.document_ser process. All matching documents are collected.FacetCategories that are specified by calling facet_ser:get_facets.Relevance in this context denotes how well a retrieved document matches the user's search query. Most fulltext search-engines use the BM25 algorithm to determine the ranking score of each document, so let's use that too.
BM25 calculates a ranking score based on the query term frequency in each documents.
See the async_bm25.erl for the implementation.
As discussed, the query_ser:do_async_query can be called to query our full-text search engine. To allow users to send queries and see the result the websocket_ser module is created. This singleton gen_serverstarts up a Misultin HTTP server on Port 3000. If you browse to http://localhost:3000 you will see a search box. Communication with the search engine is done through websockets.
So, when a user posts a query, this message is received by the websockets_ser:handle_websocket receive block. The query_ser:do_async_query function is called and query results are expected on websockets_ser:query_results function.
The query_results function formats the results as HTML and sends this through the websocket. When received, the HTML is appended to the user's page.
A similar process is executed when the facet results are received:
Some obvious features that are lacking from this sample application:
<ward@tty.nl>So, that why it's called a sample application ;-)


